Hello from sunny July! As a good tradition, it's time for MAUI UI July. Thanks to Matt Goldman for the organization.
In this article, we'll continue customizing .NET MAUI Shell. This time we'll customize the TabBar by adding a central action button. Let's get started!
Shared Code
Define a Custom TabBar with the properties for our action button:
public partial class CustomTabBar : TabBar
{
[AutoBindable]
private ICommand? centerViewCommand;
[AutoBindable]
private ImageSource? centerViewImageSource;
[AutoBindable]
private string? centerViewText;
[AutoBindable]
private bool centerViewVisible;
[AutoBindable]
public Color? centerViewBackgroundColor;
}
I am using
M.BindableProperty.Generator
NuGet package to simplify the Bindable property syntax.
We can replace .NET MAUI TabBar with our CustomTabBar:
<local:CustomTabBar CenterViewText="+"
CenterViewVisible="True"
CenterViewBackgroundColor="Red"
CenterViewCommand="{Binding CenterViewCommand}">
<!-- <local:CustomTabBar.CenterViewImageSource> -->
<!-- <FileImageSource File="dotnet_bot.png"></FileImageSource> -->
<!-- </local:CustomTabBar.CenterViewImageSource> -->
<Tab Title="Tab1" Icon="dotnet_bot.png">
<ShellContent
Title="Page1"
ContentTemplate="{DataTemplate local:Page1}"
Route="Page1" />
</Tab>
<Tab Title="Tab2" Icon="dotnet_bot.png">
<ShellContent
Title="Page2"
ContentTemplate="{DataTemplate local:Page2}"
Route="Page2" />
</Tab>
</local:CustomTabBar>
Customizing TabBar for Android
To customize your .NET MAUI Shell app for Android, you can change various components of the ShellRenderer class in the Platforms/Android/
directory of your application. Here's an example:
- Create a custom ShellRenderer class:
class CustomShellHandler : ShellRenderer
{
protected override IShellItemRenderer CreateShellItemRenderer(ShellItem item)
{
return new CustomShellItemRenderer(this);
}
}
- To customize
TabBar
create a new classCustomShellItemRenderer
. It adds a rounded button if the ShellItem is out CustomTabBar. You can use any control instead of button:
internal class CustomShellItemRenderer : ShellItemRenderer
{
public CustomShellItemRenderer(IShellContext context) : base(context)
{
}
public override View OnCreateView(LayoutInflater inflater, ViewGroup container, Bundle savedInstanceState)
{
var view = base.OnCreateView(inflater, container, savedInstanceState);
if (Context is not null && ShellItem is CustomTabBar { CenterViewVisible: true } tabbar)
{
var rootLayout = new FrameLayout(Context)
{
LayoutParameters = new FrameLayout.LayoutParams(ViewGroup.LayoutParams.MatchParent, ViewGroup.LayoutParams.MatchParent)
};
rootLayout.AddView(view);
const int middleViewSize = 150;
var middleViewLayoutParams = new FrameLayout.LayoutParams(
ViewGroup.LayoutParams.WrapContent, ViewGroup.LayoutParams.WrapContent,
GravityFlags.CenterHorizontal | GravityFlags.Bottom)
{
BottomMargin = 100,
Width = middleViewSize,
Height = middleViewSize
};
var middleView = new Button(Context)
{
LayoutParameters = middleViewLayoutParams
};
middleView.Click += delegate
{
tabbar.CenterViewCommand?.Execute(null);
};
middleView.SetText(tabbar.CenterViewText, TextView.BufferType.Normal);
middleView.SetPadding(0, 0, 0, 0);
if (tabbar.CenterViewBackgroundColor is not null)
{
var backgroundDrawable = new GradientDrawable();
backgroundDrawable.SetShape(ShapeType.Rectangle);
backgroundDrawable.SetCornerRadius(middleViewSize / 2f);
backgroundDrawable.SetColor(tabbar.CenterViewBackgroundColor.ToPlatform(Colors.Transparent));
middleView.SetBackground(backgroundDrawable);
}
tabbar.CenterViewImageSource?.LoadImage(Application.Current!.MainPage!.Handler!.MauiContext!, result =>
{
middleView.SetBackground(result?.Value);
middleView.SetMinimumHeight(0);
middleView.SetMinimumWidth(0);
});
rootLayout.AddView(middleView);
return rootLayout;
}
return view;
}
}
Customizing .NET MAUI Shell for iOS/MacCatalyst
Similar to customizing Android, you can make customizations for iOS and MacCatalyst by modifying the ShellRenderer class in the Platforms/iOS/
and Platforms/MacCatalyst/
directories of your application.
- Create a custom ShellRenderer class:
class CustomShellHandler : ShellRenderer
{
protected override IShellItemRenderer CreateShellItemRenderer(ShellItem item)
{
return new CustomShellItemRenderer(this)
{
ShellItem = item
};
}
}
- To customize
TabBar
create a new classCustomShellItemRenderer
. It adds a rounded button if the ShellItem is out CustomTabBar. You can use any control instead of button:
class CustomShellItemRenderer : ShellItemRenderer
{
UIButton? middleView;
public CustomShellItemRenderer(IShellContext context) : base(context)
{
}
public override async void ViewWillLayoutSubviews()
{
base.ViewWillLayoutSubviews();
if (View is not null && ShellItem is CustomTabBar { CenterViewVisible: true } tabbar)
{
if (middleView is not null)
{
middleView.RemoveFromSuperview();
}
if (middleView is null)
{
var image = await tabbar.CenterViewImageSource.GetPlatformImageAsync(Application.Current!.MainPage!.Handler!.MauiContext!);
middleView = new UIButton(UIButtonType.Custom);
middleView.BackgroundColor = tabbar.CenterViewBackgroundColor?.ToPlatform();
middleView.SetTitle(tabbar.CenterViewText, UIControlState.Normal);
middleView.Frame = new CGRect(CGPoint.Empty, new CGSize(70, 70));
if (image is not null)
{
middleView.SetImage(image.Value, UIControlState.Normal);
middleView.Frame = new CGRect(CGPoint.Empty, image.Value.Size);
}
middleView.AutoresizingMask = UIViewAutoresizing.FlexibleRightMargin |
UIViewAutoresizing.FlexibleLeftMargin |
UIViewAutoresizing.FlexibleBottomMargin;
middleView.Layer.CornerRadius = middleView.Frame.Width / 2;
middleView.Layer.MasksToBounds = false;
middleView.TouchUpInside += (sender, e) =>
{
tabbar.CenterViewCommand?.Execute(null);
};
}
middleView.Center = new CGPoint(View.Bounds.GetMidX(), TabBar.Frame.Top - middleView.Frame.Height / 2);
View.AddSubview(middleView);
}
}
}
Summary
The final step is registering our handlers:
public static class MauiProgram
{
public static MauiApp CreateMauiApp()
{
var builder = MauiApp.CreateBuilder();
builder.UseMauiApp<App>();
builder.ConfigureMauiHandlers(handlers =>
{
handlers.AddHandler<Shell, CustomShellHandler>();
});
return builder.Build();
}
}
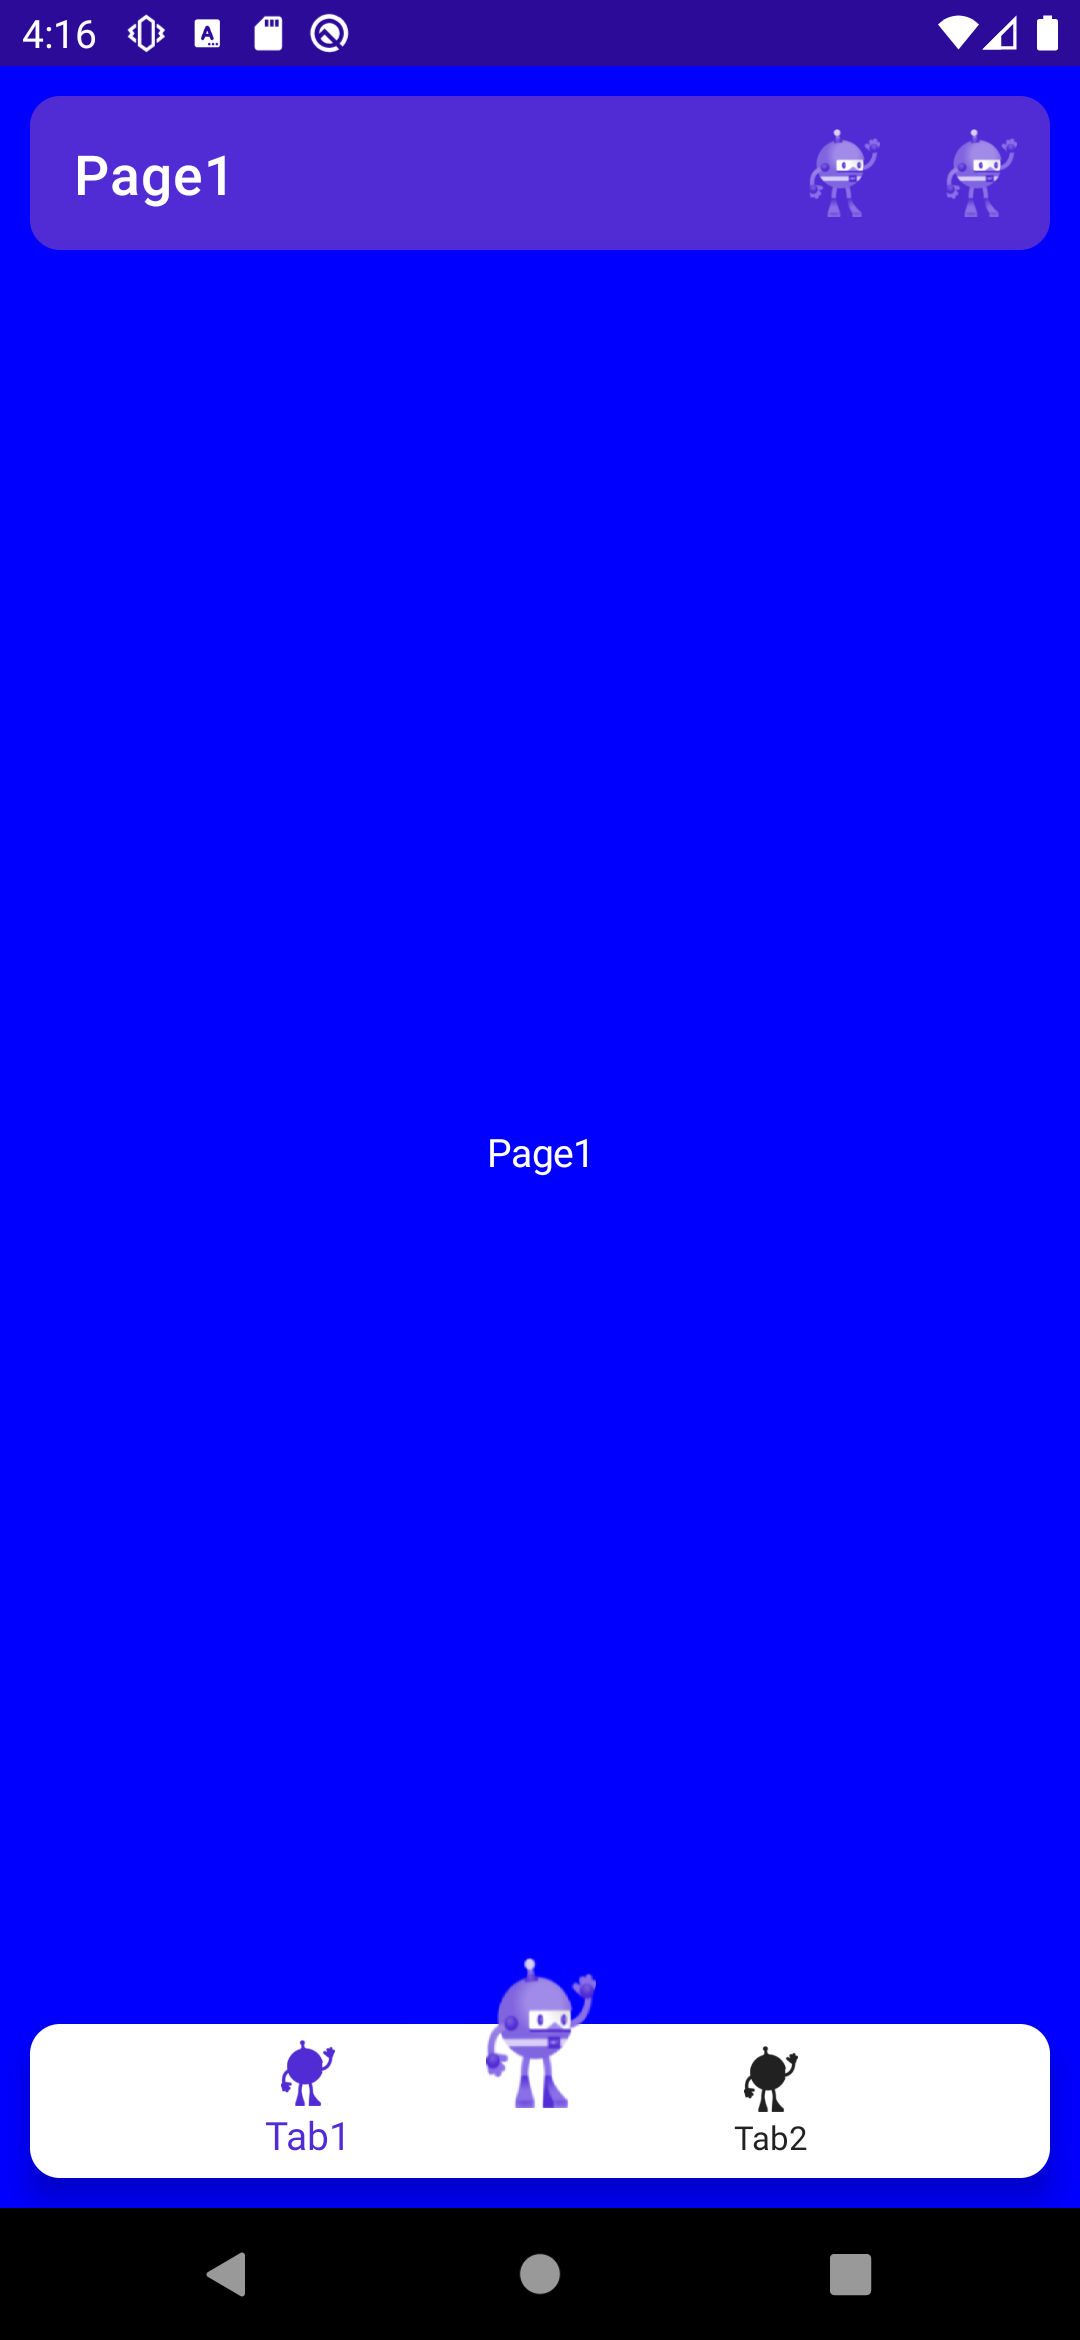
That's all we need to customize .NET MAUI Shell. Run the application and see the result:
The full code can be found on GitHub.
Happy coding!