Welcome to November!
This month, we have a new release of .NET - .NET 9 - with many improvements! That means, your .NET MAUI apps can now target .NET 9, and you can start using the new features and improvements in your apps.
According to trends more and more developers are using Visual Studio Code for .NET MAUI development. (But JetBrains made a Rider free, so the situation may change soon.)
This article is for those who staying with Visual Studio Code.
When working with .NET MAUI XAML files in Visual Studio Code, you may notice that the file structure and nesting differ from those in Visual Studio or Rider.
File nesting is automatic in Visual Studio, and the nested files can be seen in the Solution Explorer.
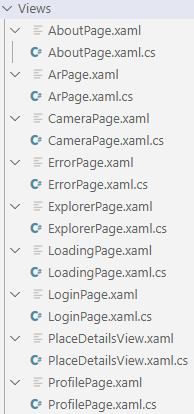
Visual Studio Code also allows to nest files, but by default, XAML files are not nested and appear in parallel.
In this article, I will show you how to nest .NET MAUI XAML files in Visual Studio Code.
Nesting .NET MAUI XAML Files in Visual Studio Code
To nest .NET MAUI XAML files in Visual Studio Code, follow these steps:
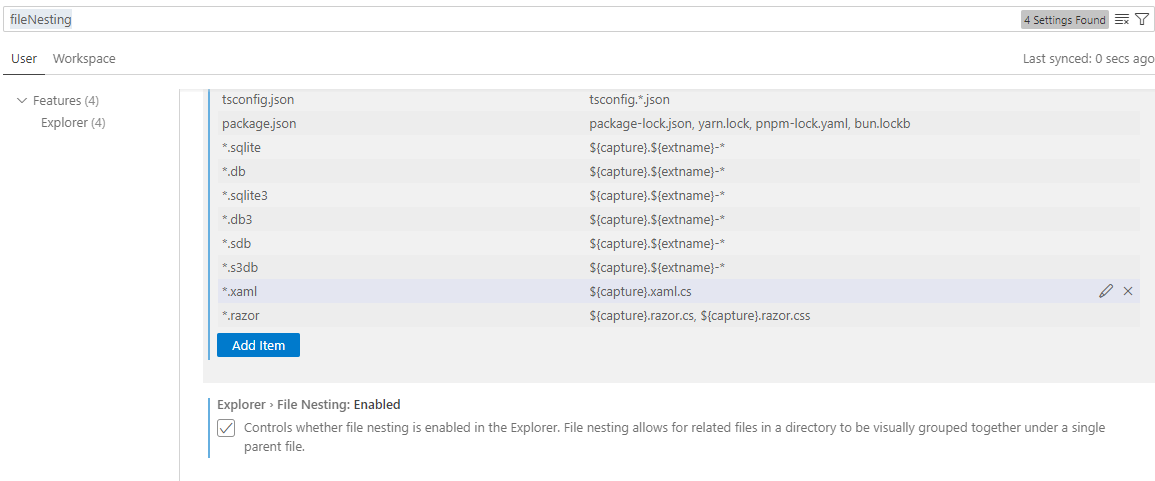
Open the VS Code settings and search the
fileNestingsettings:
Ensure the
File Nestingis Enabled (vscode://settings/explorer.fileNesting.enabled).Search for the
File Nesting: Patternssetting (vscode://settings/explorer.fileNesting.patterns). This setting allows you to define the patterns for nesting files.Select
Add Itemwith the key*.xamland use the value${capture}.xaml.cs.
Once you add the pattern, the XAML files will be nested with the corresponding code-behind files.

Happy coding!

